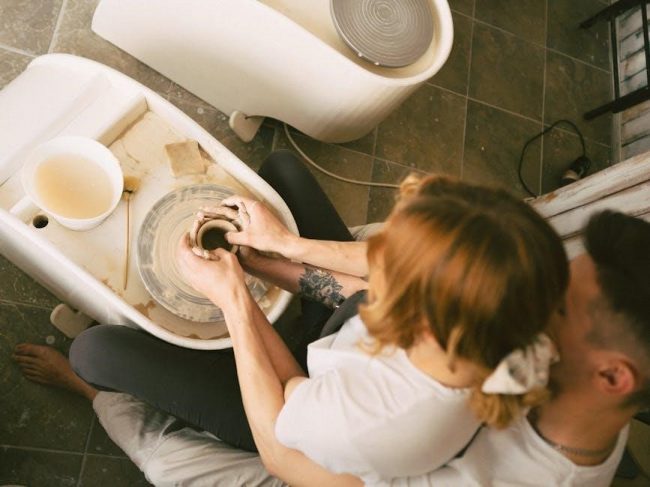
Sculpey Clay is a non-toxic, PVC-based material perfect for crafting. It’s popular among artists and beginners for its versatility and ease of use. This malleable clay offers endless creative possibilities for sculpting and designing unique pieces.
Materials Needed for Working with Sculpey Clay
To get started with Sculpey Clay, you’ll need a few essential materials. First, you’ll need the Sculpey Clay itself, available in various colors and types. A clean, stable workspace is crucial, such as a table or countertop covered with parchment paper or a silicone mat. Tools like rolling pins, shape cutters, and sculpting instruments (e.g., toothpicks or modeling tools) are helpful for shaping and detailing. A home oven is necessary for baking, as Sculpey Clay is cured at specific temperatures. An oven thermometer ensures accurate temperature control. Additional materials like glass or metal baking sheets, aluminum foil, or a cooling rack can be useful for baking and cooling your pieces. Optional items include wax paper for conditioning clay and a pasta machine for thinning or blending colors. Having these materials on hand will allow you to create and bake your Sculpey projects effectively and safely;
Preparing Your Workspace
Preparing your workspace is essential for a smooth and enjoyable experience with Sculpey Clay. Start by covering your work surface with parchment paper, a silicone mat, or wax paper to prevent clay from sticking and to make cleanup easier. Ensure the area is clean and free from dust or debris. Gather all your tools and materials within easy reach to avoid interruptions while working. If you plan to bake your pieces, preheat your oven according to the package instructions and ensure it is placed on a heat-resistant surface. Keep a bowl of water or a damp cloth nearby to help condition the clay if it becomes too firm. Good ventilation is also important, especially when baking, so open a window or use a fan to prevent fumes from accumulating. Finally, organize your tools and workspace to maximize efficiency and creativity. A well-prepared workspace sets the foundation for successful Sculpey Clay projects.
Baking Instructions
Bake Sculpey Clay at 275°F (135°C) for 15-30 minutes per 1/4 inch of thickness. Always follow package instructions for specific guidance. Adult supervision is recommended, and avoid microwaving. Test doneness by gently pressing the surface.
Temperature Guidelines
When working with Sculpey Clay, it’s essential to adhere to the recommended temperature guidelines to ensure proper curing and avoid damage. The standard baking temperature for most Sculpey products is 275°F (135°C). However, some variations like Super Sculpey may require slightly different temperatures, so always check the package instructions. It’s crucial not to exceed the recommended temperature, as this can cause the clay to burn or release harmful fumes. Use an oven thermometer to ensure accuracy, as home ovens can vary. Place the clay on a heat-resistant surface, such as a baking sheet lined with parchment paper or a ceramic tile. Never bake Sculpey Clay in a microwave or on a surface that isn’t oven-safe. Proper temperature control ensures your creations cure evenly and maintain their integrity. Always let the clay cool completely before handling to avoid burns or damage to the piece.
Time Recommendations
The baking time for Sculpey Clay depends on the thickness of your piece. A general rule is to bake for 15 minutes per 1/4 inch (6 mm) of thickness. For example, a piece that is 1/2 inch thick should bake for 30 minutes, while a 1-inch thick piece requires 60 minutes. Always refer to the package instructions, as some Sculpey products may have specific time recommendations. It’s important to bake thick pieces longer to ensure they cure properly throughout. Use a toothpick or similar tool to check for doneness—insert it gently into the thickest part; if it comes out clean, the clay is fully cured. Avoid overbaking, as this can cause discoloration or cracking. Let the piece cool completely before handling to ensure safety and prevent damage. Proper timing ensures your Sculpey creations are durable and long-lasting.
Oven Setup Tips
Proper oven setup is crucial for successfully baking Sculpey Clay. Preheat your oven to the recommended temperature of 275°F (135°C) before placing your clay pieces inside. Use a baking sheet lined with parchment paper or an oven-safe work mat to prevent sticking. Place the clay pieces on the prepared surface, ensuring they are spaced evenly to allow for proper air circulation. Avoid placing clay directly on metal surfaces, as this can cause uneven baking. For added stability, you can bake smaller pieces on a glass or ceramic tile placed on the baking sheet. Always use an oven thermometer to ensure accurate temperature control. If you’re baking multiple pieces, arrange them in a single layer to prevent overcrowding. Keep the oven door slightly ajar if you’re concerned about temperature fluctuations. Never bake Sculpey Clay in a microwave or on a stovetop, as this can cause uneven curing or damage the clay. Proper oven setup ensures your pieces bake evenly and safely.
Testing for Doneness
Testing for doneness is essential to ensure your Sculpey Clay pieces are properly cured. After baking, remove the piece from the oven and let it cool completely. Once cooled, gently press the surface of the clay; it should feel firm and hard. If the clay feels soft or squishy, it may not be fully baked. For thicker pieces, check the thickest areas to ensure they are cured throughout. Avoid touching the piece immediately after baking, as it will be hot. If unsure, bake the piece for an additional 5-10 minutes and test again. Properly cured clay will be durable and resistant to indentation. Over-baking can cause discoloration or cracking, while under-baking may result in a fragile or soft finish. Always follow the recommended baking time and temperature guidelines for the best results.
Essential Tools for Sculpting
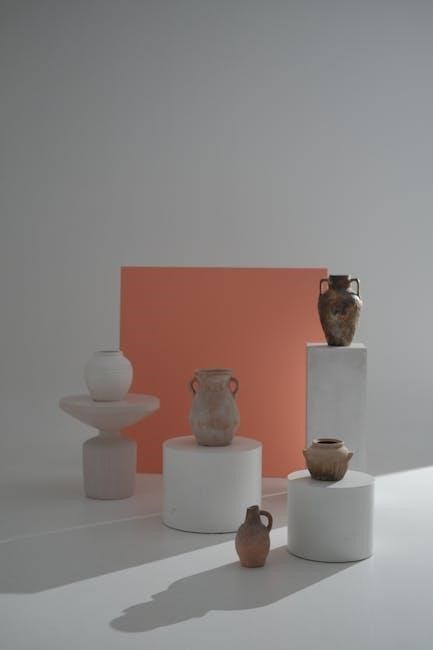
Having the right tools is crucial for achieving professional results with Sculpey Clay. A rolling pin is essential for flattening and smoothing out the clay to your desired thickness. Shape cutters or cookie cutters can help create uniform shapes and designs. A sharp utility knife or clay blade is perfect for trimming excess clay or making precise cuts. For detailed work, sculpting tools like modeling tools or toothpicks are indispensable for creating textures, patterns, and intricate details. A work surface, such as a ceramic tile or parchment paper, provides a clean and stable area for crafting. Additionally, a home oven is necessary for baking your pieces, and an oven thermometer ensures accurate temperature control. These tools will help you shape, mold, and refine your Sculpey Clay creations with ease and precision, allowing you to bring your artistic vision to life.
Basic Sculpting Techniques
Mastering basic sculpting techniques is essential for working with Sculpey Clay. Start by conditioning the clay to ensure it’s pliable and easy to work with. Roll it out using a rolling pin to achieve your desired thickness. Use shape cutters or household items like cookie cutters to create uniform shapes. For more intricate designs, hand-shape the clay into forms like beads, coils, or small sculptures. To combine pieces, simply press them together gently, ensuring a secure bond. For details like textures or patterns, use tools like toothpicks or textured surfaces. When assembling pieces, make sure they are evenly thick to prevent warping during baking. Practice these foundational techniques to build confidence and improve your skills. By starting with simple methods, you’ll create a solid base for more complex projects. These techniques are the building blocks for bringing your creative ideas to life with Sculpey Clay.
Troubleshooting Common Issues
When working with Sculpey Clay, common issues can arise, but they are easily solvable. If the clay is too hard, gently knead it until it becomes pliable. If it’s too soft, refrigerate it for 10–15 minutes to firm up. To prevent sticking, lightly dust your tools or workspace with cornstarch or baby powder. If pieces stick together, carefully separate them with a blunt tool before baking. For uneven thickness, ensure your design is uniform to avoid warping during baking. If baked pieces feel brittle, they may have been overbaked; reduce the baking time next time. If the clay doesn’t hold its shape, check that it was conditioned properly and baked at the correct temperature. For cracks, smooth them with a tool before baking or apply a thin layer of fresh clay. By addressing these issues early, you can achieve professional-looking results and enjoy a smoother crafting experience with Sculpey Clay.

Creative Project Ideas
Sculpey Clay offers endless possibilities for creative expression. Beginners can start with simple projects like making custom jewelry, such as pendants, earrings, or charms. For home decor, create decorative items like miniature food charms, ornaments, or personalized keychains. Try crafting 3D sculptures, such as animals, figurines, or abstract art, to showcase your skills. Another fun idea is making functional pieces, like coasters, bottle stoppers, or drawer pulls. For seasonal crafts, design holiday-themed ornaments, Easter eggs, or Halloween decorations. Kids and adults alike can enjoy making charm bracelets or personalized gifts, such as custom-shaped magnets or picture frames. Experiment with blending colors to create unique marbled effects or layered designs. Sculpey Clay’s versatility makes it perfect for both practical and artistic projects, allowing you to bring your imagination to life in countless ways. Whether you’re a seasoned crafter or just starting out, Sculpey Clay offers a world of creative possibilities to explore.
Safety Measures
When working with Sculpey Clay, it’s essential to follow proper safety measures to ensure a safe and enjoyable experience. Always read and follow the instructions on the packaging carefully. Never microwave Sculpey Clay, as it can cause uneven heating, burn the clay, or create harmful fumes. Baking should be done in a well-ventilated area, and an adult should supervise the process. Keep the clay and baked pieces away from children and pets to avoid accidental ingestion. Avoid overheating the clay, as it can release toxic fumes. Use oven mitts or tongs to handle hot pieces, and never exceed the recommended temperature of 275°F (135°C). While Sculpey Clay is non-toxic, it’s important to wash your hands after handling it and avoid eating or inhaling any particles. Following these guidelines ensures a safe and successful crafting experience with Sculpey Clay.
Conditioning Techniques
Conditioning Sculpey Clay is an essential step to ensure it’s pliable and easy to work with. Begin by kneading the clay on a clean, dry surface until it becomes soft and uniform. If the clay feels stiff, warm it slightly by holding it in your hands or placing it near a warm (not hot) surface. For tougher clay, use a pasta machine to roll it out repeatedly, starting at the thickest setting and gradually decreasing the thickness. This process breaks down the clay’s internal structure, making it more manageable. Avoid overheating the clay, as it can become too soft or develop air bubbles. Break large blocks into smaller pieces for easier handling. Conditioning ensures the clay is even in texture, preventing cracks during sculpting. Properly conditioned Sculpey Clay will be smooth and responsive, allowing for intricate details and seamless blending. Regular conditioning also extends the clay’s usability over time.
Alternative Baking Methods
While conventional ovens are the most common way to cure Sculpey Clay, alternative methods can be effective in specific situations. For those without access to a traditional oven, a slow cooker or DIY setup can work. Place the clay on a heat-resistant surface, cover it with foil, and heat it at a low temperature (around 200°F) for an extended period, ensuring even curing. Some artists use a slow cooker on the “warm” setting, carefully monitoring the temperature to avoid overheating. Air dry methods are also possible for thin pieces, though they may take several days to fully harden. Note that alternative methods may not provide the same consistency as oven baking and could affect the clay’s durability. Always test small samples first to ensure desired results. These methods are ideal for small projects or when traditional baking isn’t feasible, offering creative solutions for crafting with Sculpey Clay.
Advanced Sculpting Techniques
Mastering advanced sculpting techniques with Sculpey Clay can elevate your creations to professional levels. One popular method is layering, where thin sheets of clay are built up to create intricate designs. This technique allows for detailed textures and patterns. Another advanced approach is blend and merge, where different colors are mixed and gradated to achieve smooth transitions, adding depth to your work. For intricate details, try stamping or impressing tools into the clay to create textures like fabrics, metals, or natural elements.
- Use liquid clay as a adhesive for attaching small parts after baking.
- Experiment with mixed media by embedding beads, fibers, or other materials into the clay.
- For complex pieces, bake in stages, allowing each layer to cure before adding more details.
These techniques require patience and practice but offer endless possibilities for creating sophisticated and unique sculptures with Sculpey Clay.
Post-Bake Finishing
After baking, Sculpey Clay creations can be enhanced through various finishing techniques. Allow the piece to cool completely before handling. Lightly sanding the surface with fine-grit sandpaper can smooth out any imperfections or rough edges. For added color, acrylic paints or sealants can be applied to protect the clay and give it a glossy finish.
- Use a soft brush to remove dust or debris after sanding.
- Apply a clear acrylic spray for a durable, long-lasting finish.
- For intricate details, paint small areas with precision brushes before sealing.
Some artists also bake their pieces multiple times, adding layers of paint or resin between bakings for a professional look. Proper finishing ensures your Sculpey creations are not only visually appealing but also long-lasting and protected from wear.
Displaying Finished Pieces
Displaying your finished Sculpey creations can enhance their beauty and showcase your craftsmanship. Consider using glass cases, shelves, or stands to protect and highlight your pieces. For added elegance, arrange them in a themed setting or diorama to tell a story.
- Use a clean, dry cloth to gently remove dust before display.
- Apply a UV-resistant coating to prevent color fading over time.
- Position pieces near natural light to accentuate textures and colors.
Grouping similar pieces together can create a visually appealing collection. For fragile items, secure them with Museum Wax or adhesive dots to prevent shifting. Regularly clean and inspect your displays to maintain their appearance. Proper presentation ensures your artwork remains vibrant and enjoyable for years to come.
Additional Resources
For further learning and inspiration, explore these resources to enhance your Sculpey clay journey. Official Sculpey websites offer detailed guides, tutorials, and product information to help you master various techniques. Additionally, craft communities, forums, and social media groups provide valuable tips and ideas from experienced artists.
- Visit the official Sculpey website for product guides and project tutorials.
- Check out YouTube channels dedicated to polymer clay crafting for visual demonstrations.
- Join online forums and social media groups to connect with fellow crafters and share ideas.
- Explore books and eBooks on polymer clay techniques for in-depth learning.
These resources will help you stay updated on the latest trends, tools, and methods in Sculpey clay crafting. Whether you’re a beginner or an advanced artist, continuous learning will expand your creative possibilities and refine your skills.
Frequently Asked Questions
Frequently Asked Questions about Sculpey clay address common concerns and provide clarity for crafters. One of the most asked questions is about the ideal baking temperature, which is typically 275°F (135°C). Another concern is the baking time, with recommendations of 15 minutes per 1/4 inch of thickness. Crafters also wonder if Sculpey clay can be baked multiple times, and the answer is yes, as long as it is conditioned properly before reuse.
- Q: What temperature should I bake Sculpey clay? A: Preheat your oven to 275°F (135°C) for optimal results.
- Q: How long should I bake my project? A: Bake for 15 minutes per 1/4 inch of thickness to ensure proper curing.
- Q: Can I bake Sculpey clay more than once? A: Yes, but condition the clay before re-baking to maintain its workability.
- Q: Why does my clay crack after baking? A: Cracks may occur if the clay is too thin or uneven; ensure even thickness for best results.
- Q: Is Sculpey clay safe to bake in a home oven? A: Yes, but always follow the recommended temperature and time guidelines.
These FAQs provide essential guidance for working with Sculpey clay, helping crafters achieve professional-looking results while avoiding common pitfalls.
Beginner Tips
Starting with Sculpey clay can be both exciting and intimidating, but with the right guidance, beginners can achieve stunning results. First, always condition the clay before use by kneading it until it becomes pliable. This ensures smooth manipulation and prevents cracking. Begin with simple projects, such as small beads or charms, to build confidence and skill. Use the right tools, like rollers and cutters, to shape and refine your designs. When baking, follow the recommended temperature of 275°F (135°C) and time of 15 minutes per 1/4 inch of thickness. Allow pieces to cool completely before handling to avoid warping. For even baking, place items on a flat, heat-resistant surface like parchment paper or a ceramic tile. Finally, practice patience and don’t be discouraged by early mistakes—each project is an opportunity to learn and improve. Start small, stay creative, and enjoy the process of transforming raw clay into beautiful, durable art.
Example Projects
Sculpey clay is perfect for creating a variety of fun and functional items. One great starter project is making personalized jewelry, such as pendants, earrings, or charms. You can also craft decorative items like mini ornaments, keychains, or fridge magnets. For home decor, try making custom coasters or wall art. Another idea is to create small figurines or charms that can be used as zipper pulls or gift embellishments. If you’re feeling ambitious, you can try your hand at making functional items like bowls or candle holders. These projects are excellent for practicing basic techniques and experimenting with different colors and textures. Start with simple shapes and gradually move on to more intricate designs as you gain confidence. The versatility of Sculpey clay ensures that there’s no limit to the creative possibilities, making it a great medium for both beginners and experienced crafters.
Working with Sculpey clay is a rewarding and creative process that offers endless possibilities for crafters of all skill levels. From simple ornaments to intricate sculptures, Sculpey clay’s versatility allows you to bring your imagination to life. Always remember to follow the baking instructions carefully, as proper curing ensures your pieces are durable and long-lasting. Safety is key, so adults should oversee the baking process, and proper ventilation is essential. Whether you’re a beginner or an experienced artist, Sculpey clay provides a fun and accessible medium for self-expression. Experiment with colors, shapes, and techniques to expand your creative horizons. With patience and practice, you’ll master the art of crafting with Sculpey clay and enjoy the satisfaction of creating unique, handmade pieces. Happy crafting!
Final Safety Reminder
When working with Sculpey clay, always prioritize safety to ensure a enjoyable and hazard-free experience. Adult supervision is recommended during the baking process, as ovens can reach high temperatures. Never exceed the recommended temperature or baking time specified in the instructions, as this can release harmful fumes. Keep the clay and baked pieces away from children and pets, as they may attempt to ingest them. While Sculpey clay is non-toxic, it is not edible and should be handled with clean, dry hands. Proper ventilation is essential when baking to prevent inhaling fumes. Avoid overheating the clay, as it can cause discoloration or unpleasant odors. Always let baked pieces cool completely before handling to avoid burns. By following these guidelines, you can safely enjoy crafting with Sculpey clay and create beautiful, long-lasting pieces. Remember, safety is key to a fun and successful crafting experience.
